TAGS
Once our account managers have completed the initial setup for your venue, you can begin personalising the system. One of the most useful custom features is the ability to create and apply Tags, allowing you to tailor the system specifically to your venue’s requirements.
By attaching tags to items like bookings, billing documents, guest profiles, rate plans, and email templates, your team can streamline daily workflows and keep operations organised. Categorising tags specifically to where they belong reduces clutter, prevents staff errors, and allows team members to filter and find key information in seconds.
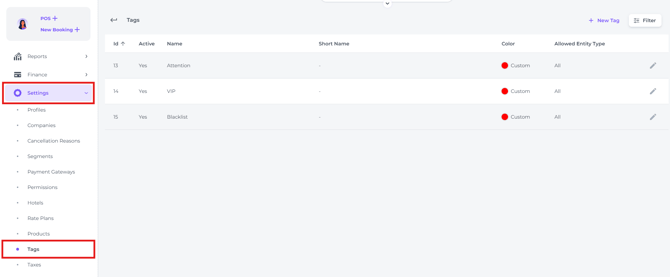
The Tags feature can be found in the Main Menu under Settings - Tag Settings.
You will discover a set of default tags ready for use and create your own custom tags.
CREATE a Tailored Tags for your PMS first:
To make sure your tags are tailored to your specific needs and work effectively, you must create them first.
Create tags following the below steps:
-
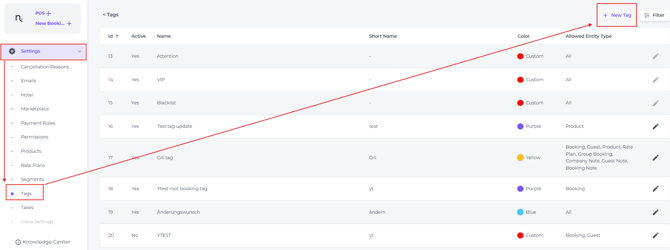
From the main menu choose Settings - Tags - + New Tag:
-
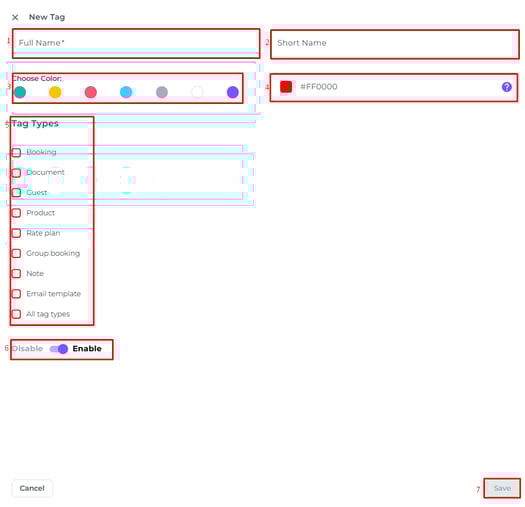
Fill out the fields:
-
Full Name - Enter a suitable name for the tag
-
Short Name - Enter an abbreviation of the full name
-
Choose Colour - Select a colour from the standard options
-
Custom Colour - Use the colour picker to create a custom shade
-
Tag Types - Select the category to which the tag should apply
-
Enable/Disable Toggle - Use this to set the tag as active or inactive; useful if you are not yet ready to use it
-
Click Save - Confirm the creation of your tag
💡Tip:
Tags can be assigned to multiple Tag-Types:
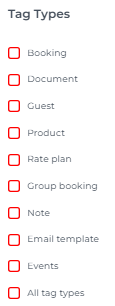
Selecting 'All tag types' makes the tag available everywhere, which may not always be appropriate.
We recommend assigning tags to specific Tag Types instead, so they are only used in relevant areas.
Benefits of Specific Tag Assignment:
-
Reduces Clutter: Team members only see relevant tags, such as "Vegan" on guest profiles instead of in payments.
-
Minimises Error: Helps prevent mistakes by showing staff only the tags relevant to the task at hand.
-
Speeds up Entry: Filtered menus allow your team to find the right options in seconds.
Tags can be attached to:
(Click a section to jump directly to that part of the article.)
-
Bookings
-
(Billing) Documents
-
Guest (profiles)
-
Products
-
Rate Plans
-
Notes
-
Email Templates
-
Room Calendar
1. Assign Tags to Bookings:
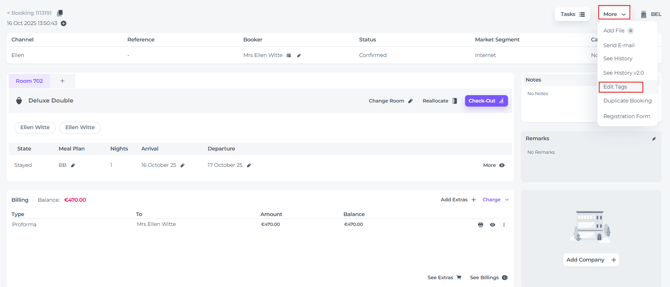
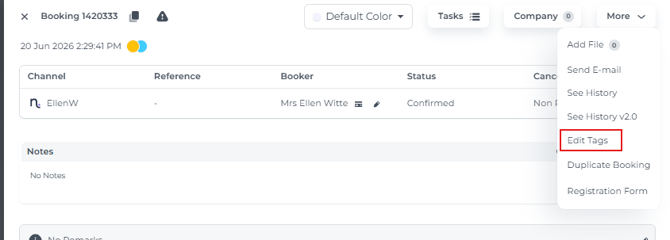
- On the Booking page for the relevant booking, click the More button and select Edit Tags:
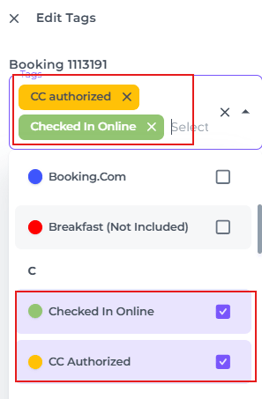
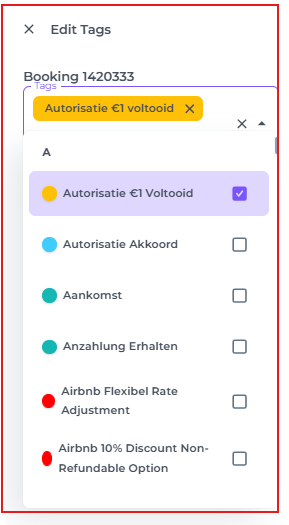
- Select the Tag you wish to assign to the relevant booking. You may apply multiple tags to a single booking if required:
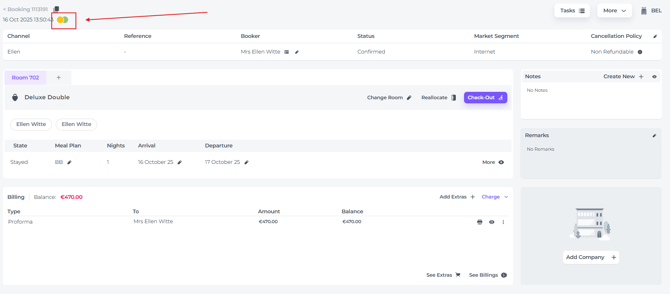
- The assigned tags will be visible on the Booking page:
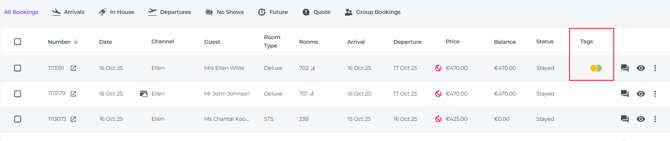
- They will also appear in the Booking List:
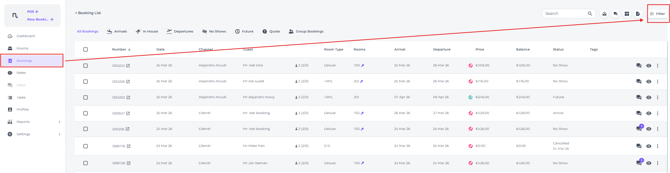
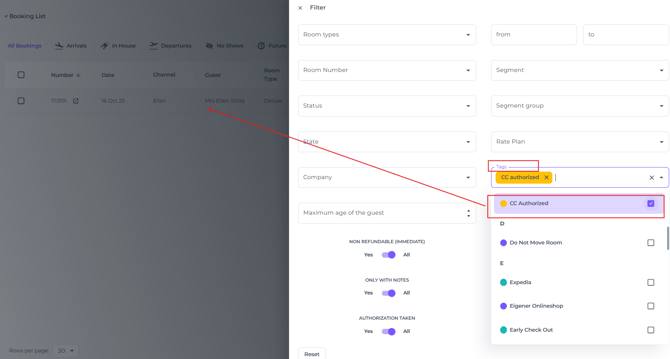
- Additionally, you can use the Filter Function on the Booking list to sort and view all bookings that share a specific tag:
2. Assign Tags to Billing Documents:
- On the Booking Page of the relevant reservation, navigate to the Billing section.
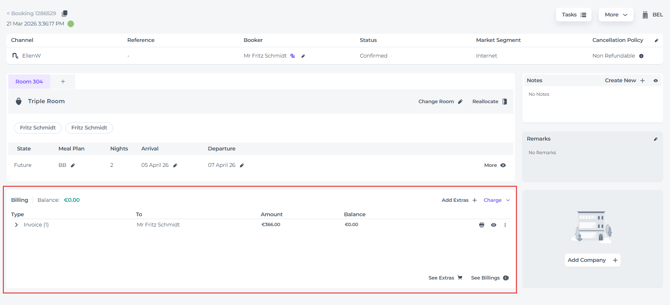
- Select the Document that needs a Tag - Click the 'More Actions' button (the three dots) behind the document and select Edit Tags:

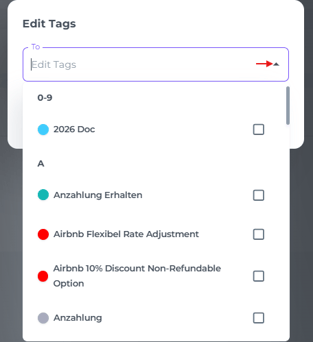
- In the pop-op screen that appears click the small arrow to open up the Tags List and select the desired Tag:
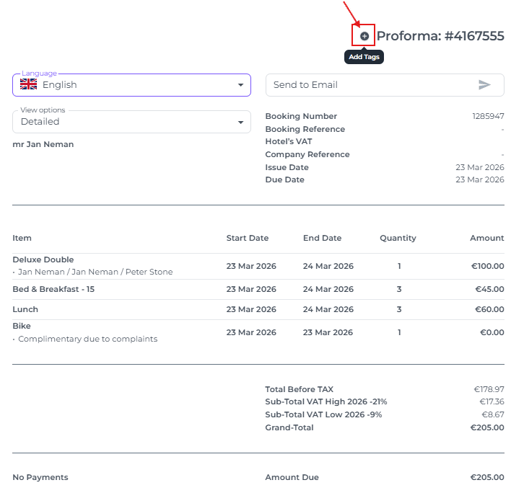
- Additionally you can add a Tag to the document directly as well (the result will be the same):
Open the document by clicking on the eye symbol behind it:
- And simply click on the 'Plus' sign on the left of the document ID:
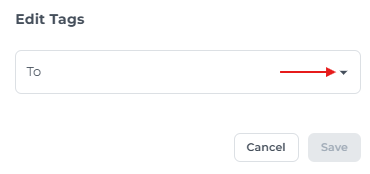
- In the pop up screen that appears Select one or multiple tags to apply:
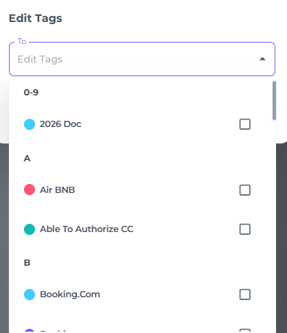
- Select the Tag applicable
3. Assign a tag to a Guest Profile:
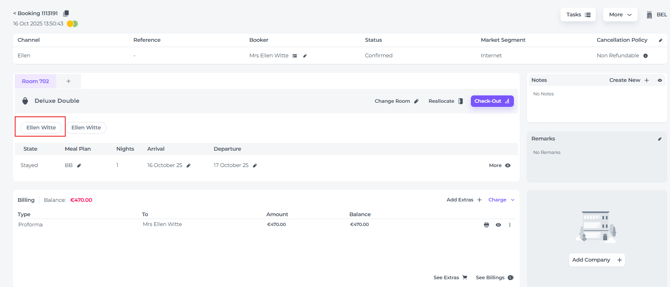
- On the booking page for the relevant booking, click on the Guest’s name to open their profile.
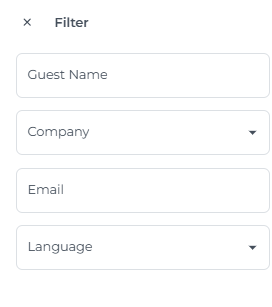
*Additionally you can search a Guest Profile in the tab Profiles form the main menu: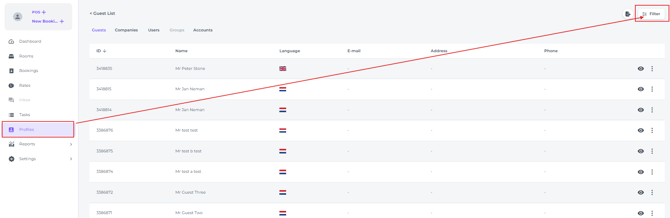
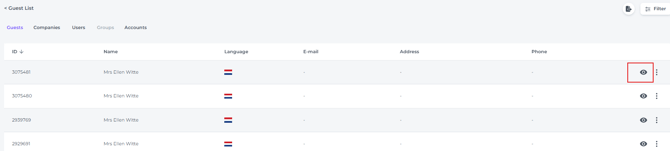
- When you have located the desired profile, open it by clicking on the eye symbol:
- Click the plus symbol
 to attach one or more tags to this guest profile.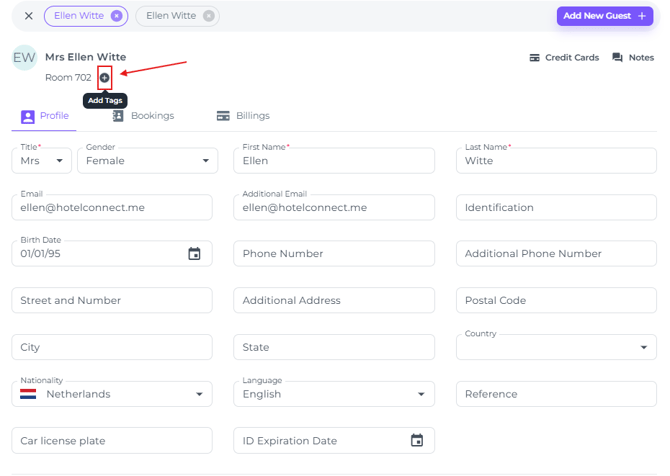
4. Assign a tag to a specific Product:
- From the main menu go to Settings and select Products:
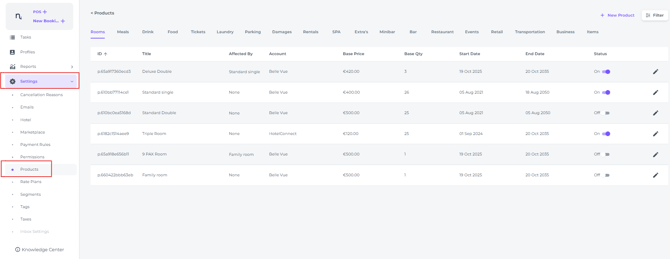
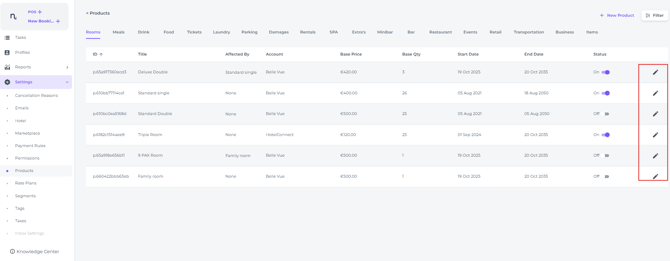
- Choose the product you wish to tag and click on the pen icon/amend button to edit the product details:
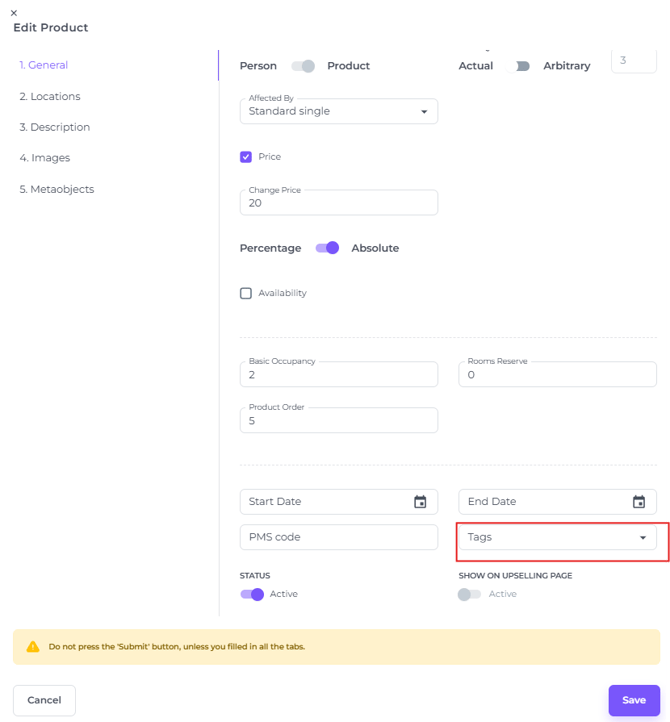
- In the General tab, at the bottom of the page, set one or multiple tags for the selected product and Save your changes:
5. Assign a tag to a Rate Plan:
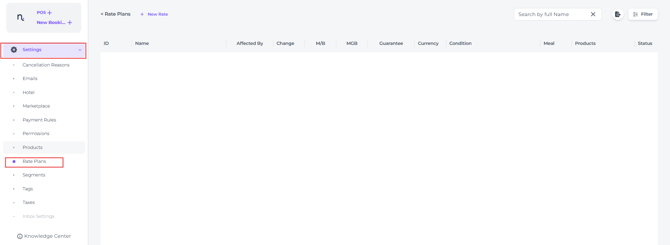
- From the main menu select Settings - Rate Plans:
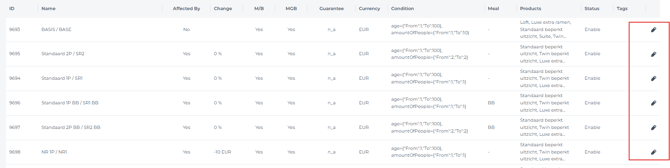
- Select the Rate Plan you wish to tag and click on the pen icon/amend button to edit the Rate Plan details:
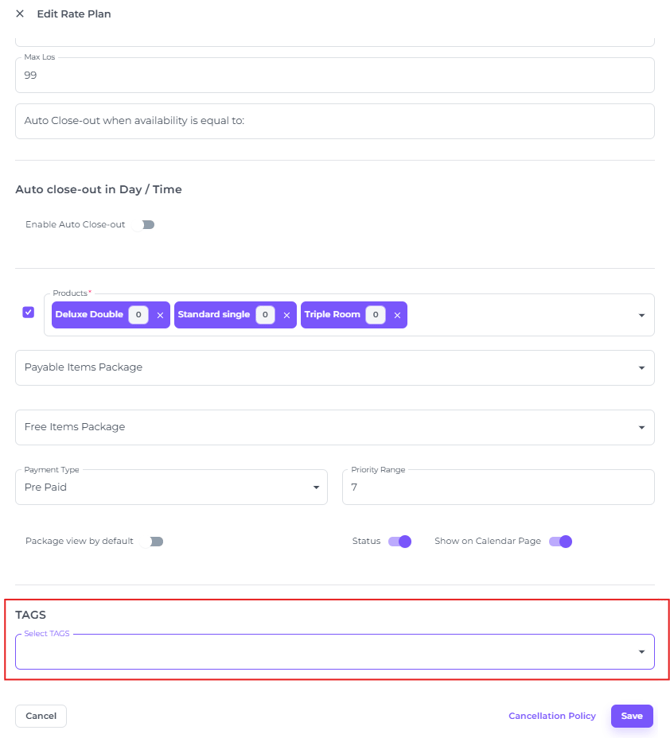
- Scroll down to the Tags Field:
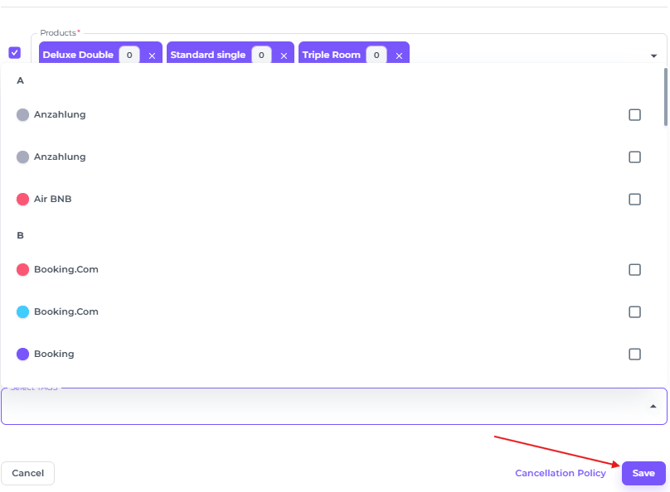
- Set one or multiple tags for the selected Rate Plan and Save your changes.
6. Assign a tag to a Note:
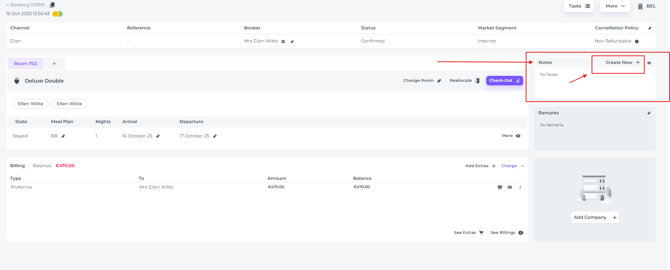
- On the booking page for the relevant booking go to the Note section and click on Create New to add a Note:
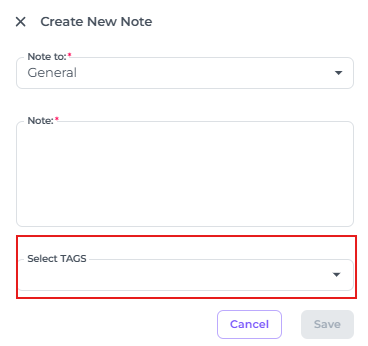
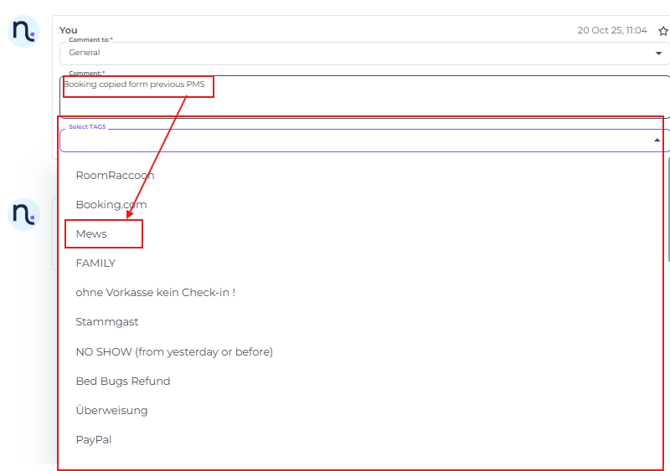
- Create your note and select one or multiple tags and Save your changes:
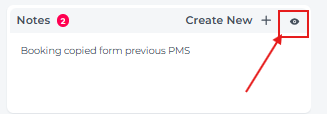
- To add a Tag to an existing Note view the Notes section by clicking on the Eye icon:
- Click on Edit
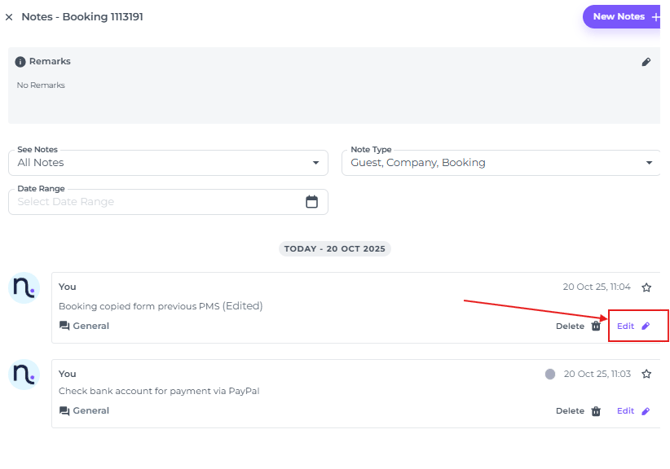
- Attach the Tag desired:
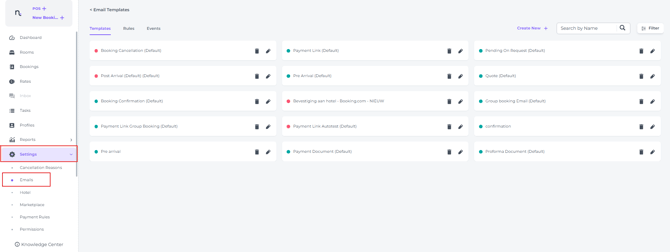
7. Assign a tag to an Email Template:
- From the main menu select Emails:
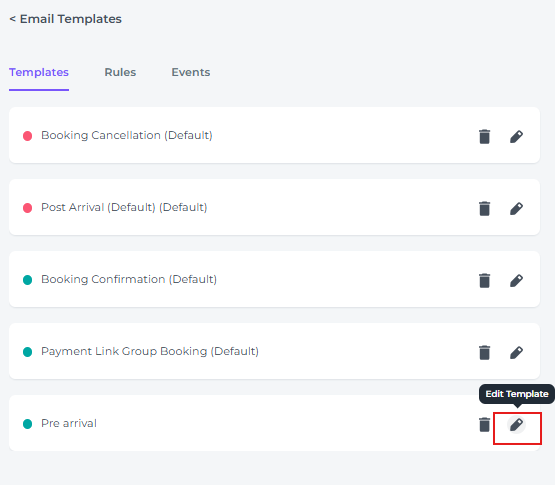
- Choose the Template you wish to tag and open by clicking on the Pen icon/ Edit button:
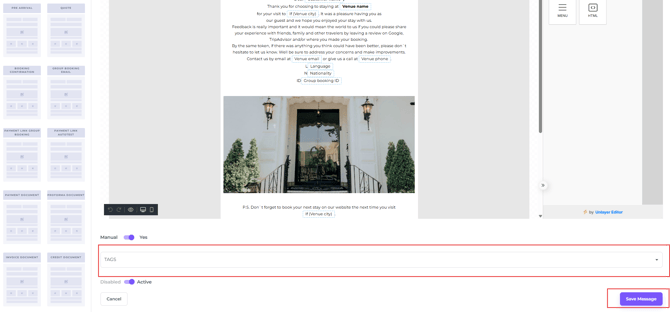
- At the bottom of the page set one or multiple tags and Save your changes.
8. Assign Tags to a booking via the room calendar
- Click once on the booking in the Room Calendar you wish to add a tag to. The booking pop up will appear.
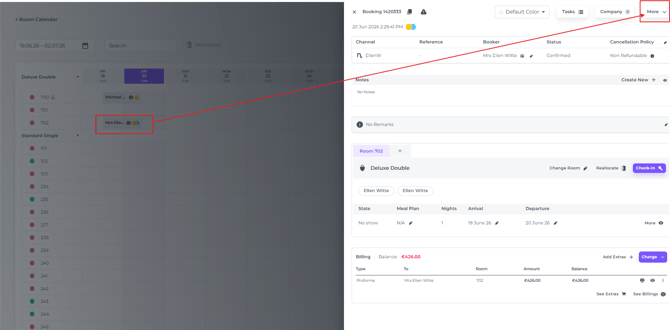
- Click on More to edit tags:
- Select (another) tag to add to the booking:
- In the booking pop‑up, you can see which tags are applied. Hover over a tag to view a detailed breakdown:
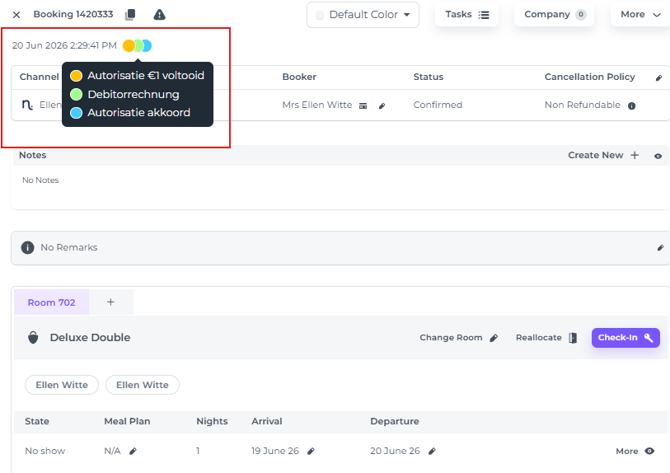
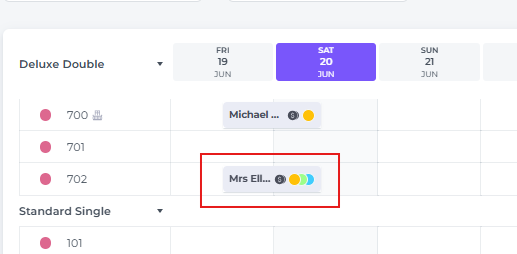
- Tags linked to reservations are immediately visible when you open the Room Calendar. If tags are used frequently, you will quickly become familiar with the meaning of each tag colour, making it easier to scan the calendar without opening every booking to review its details: