To begin creating a group booking, select New Booking and use the toggle in the pop-up window to switch to Group Booking:

The 4 booking creation steps that need to be taken will be described below:
Step 1 - Define Booking Criteria
- Select Room Types:
Choose the desired room type for your group:
If there are multiple room types applicable create a new room type by clicking on +Add Room :
For example, there may be guests within the group who require a Single room:
☝️Be mindful
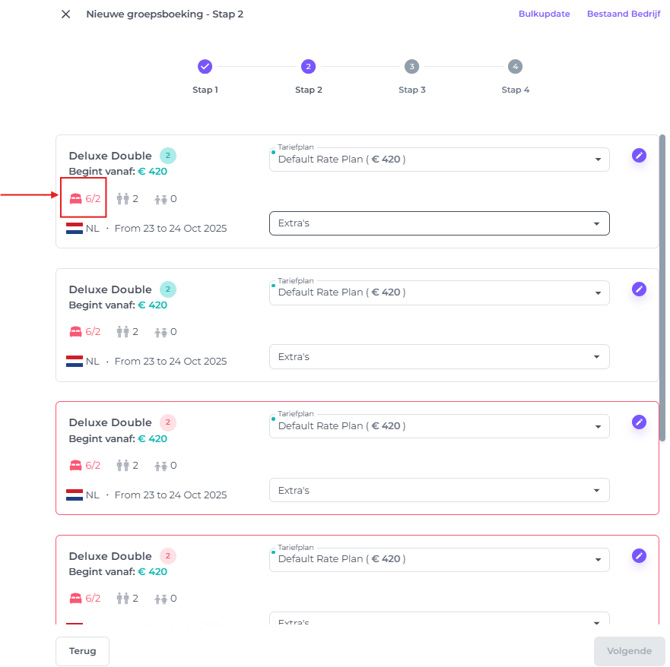
If you select more rooms than are available, this will be indicated in step 2 of the booking process. Rooms that exceed availability will be highlighted with a red border: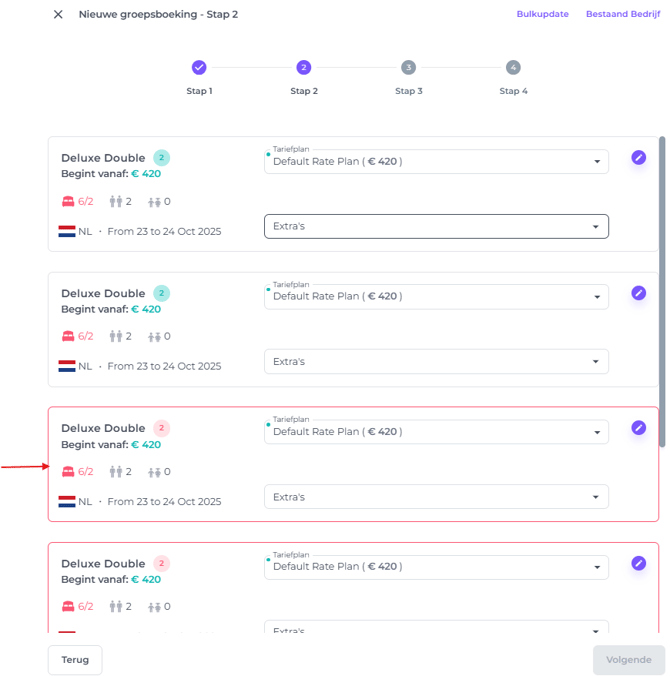
In this example, 6 rooms were selected when only 2 were available:
If you see that the selected rooms are unavailable, please return to step 1 and adjust the number of rooms requested. Choose other room types instead that are available.
- Specify Room and Guest Counts:
For each room type enter the number of rooms required and the number of guests (adults and children) for each room type:
- Select Group Nationality:
Choose the nationality of the group (*individual guest nationality can be determined later in step 3 of the booking process):
- Define Reservation Dates:
Select the arrival and departure dates:
📝Note:
It is possible to have different stay dates per room type within one group booking.
Alternatively, if you need the same room type for different stay periods, simply click Add Room again, select the same room type, and assign a different stay date.
For instance, consider a business group where employees stay during weekdays, and the overall reservation extends across several months—such as a six-month contract. This feature is especially useful when a company agreement is in place and the stay dates are scheduled in advance.

Step 2 - Determine Rates and Extras
- Click Get Rates:
to go to step 2 of the booking process:

- Select Rate Plan:
Per room Choose the appropriate Rate Plan
Each room / reservation can have its own Rate Plan if desired:
- Update Rates (if desired):
Update the rates per room per day if there are various rates applicable/ negotiated by clicking on the pen icon/amend button behind each room:
Simply amend the prices manually per room:
☝️Please note:
If meal plans are linked to the selected Rate Plan (as configured in your Rate Plans Settings*), the displayed amount reflects the total stay INcluding breakfast
But:
If you would like to adjust the rates per day (by clicking on the Pen icon (edit), 
the day rates will show you EXcluding breakfast—mirroring how the Rate Calendar always presents Room Only rates.
To illustrate, the image displays a scenario with a single room selected under a rate plan that includes a meal plan. The total amount shown is €450 (including breakfast), while the daily amount reflects €420 for the Room Only rate:

☝️Be mindful of this when changing the daily rates.
*Rate Plan Settings:

Use the Bulk Update to amend in bulk (multiple rooms in one go, or various rate plans at once):
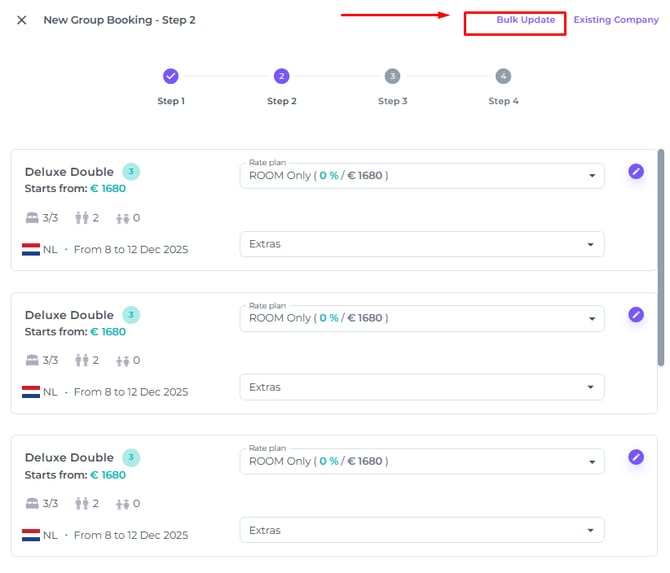
Clicking on the Bulk Update will show you a pop up screen where you can filter and amend rates for multiple bookings:
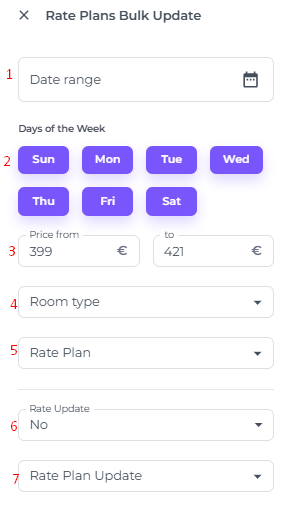
- Date Range - To filter by specific dates> Select the period within the group booking when the reservations occur.
- Weekdays - If you would like to exclude particular week days, you can disable these by clicking on them (the weekday button clicked will turn white).
- Price Range -Filter by the specific price range you want to adjust.
- Room Type - Select the room types you wish to update based on the chosen period and price range.
- Rate Plan - Choose the rate plan of those reservations within the group booking that you would like to adjust.
- Rate Update - Select Relative to adjust rates by a percentage, or Fixed to set a specific rate amount.
- Rate Update Plan - Choose to change the Rate Plan of the reservations based on the chosen criteria.
- Add Extras (if applicable):
Select any additional services or amenities required (e.g., Breakfast - If not included in the Rate Plan - , Parking, Bike Rental etc.):
Step 3 - Enter Group and Booker Information
- Group Name:
Enter a group booking name:
- Guest Information:
Per room enter guest names, ID, age, title, and nationality:
📝Note
You do not need to complete this step right away. If the booker has not yet provided a rooming list, you can still secure the rooms by creating the group booking now and adding guest details as they become available.
- Company Details:
Enter the company details:
- Remarks (Optional):
Add a remark to the group booking or to the individual reservations within the group:
- When all details are filled out:
Hit Request: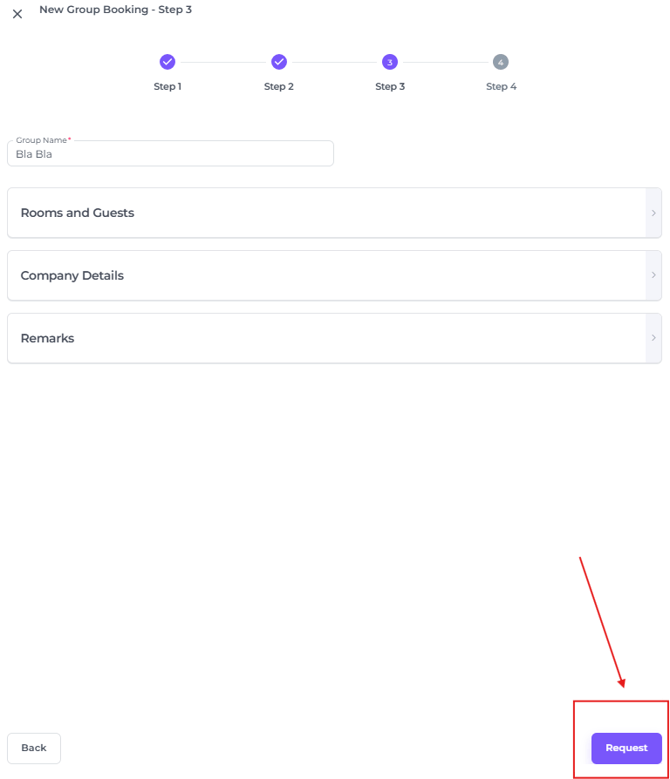
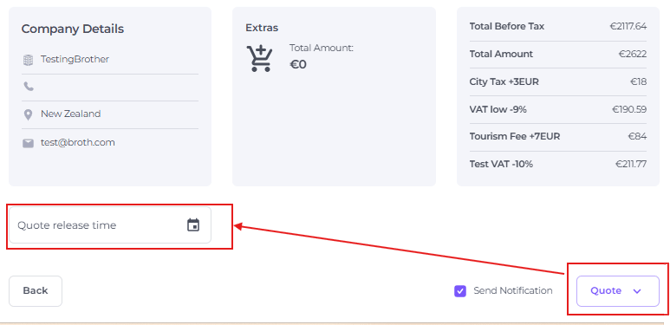
Step 4 - Review and Confirm

- Review Booking Summary:
Verify all booking details, including room types, rates, extras, company information, and total balance before confirming: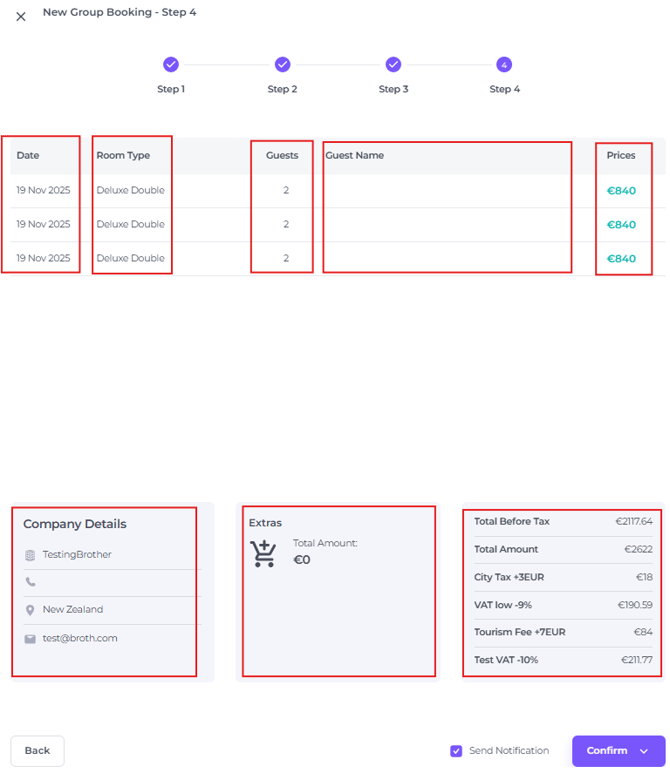
- Send Confirmation Email:
Choose whether to automatically send a confirmation email to the group, If not desired, tick of the box Send Notification: 
- The last step:
Confirm the booking, or create a Quote Booking, Choose the one applicable: - ☝️Make sure you precisely click on the arrow to see the options:

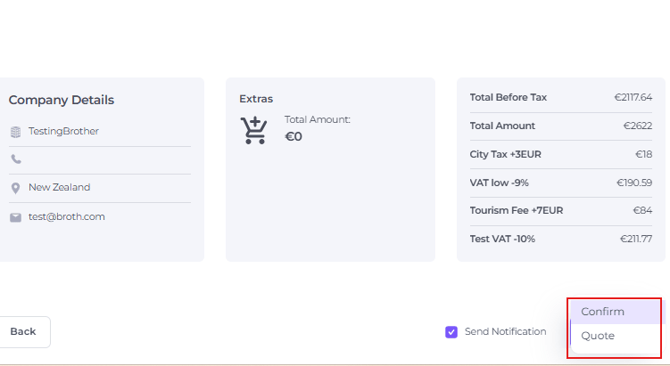
Confirm or Quote:
- Confirm: Finalise the booking and proceed with the reservation.
- Quote: A pop-up will prompt you to set the release date and time—this determines when the booking will be automatically cancelled if it is not confirmed manually.