⛔ No Departure Restriction – What does it mean?
There are occasions when you may prefer not to have new guests departing at your property on specific days. This could be due to limited staffing, special events requiring undivided attention, scheduled maintenance, or housekeeping tasks where a pause in arrivals helps lighten the team’s workload.
When the No Departure restriction is active, bookers cannot select an arrival date that falls on the restricted days. If you have set the No Departure restriction for specific days, availability will automatically be set to zero across all channels and for manual bookings on those dates.
☝️Mind you: Guests can still book a stay that overlaps the restricted dates, as long as their departure does not fall on the specified restriction days
RESTRICTIONS ARE SET IN THE BULK UPDATE IN THE RATES CALENDAR:
- From the main menu choose Rates - Bulk Update:
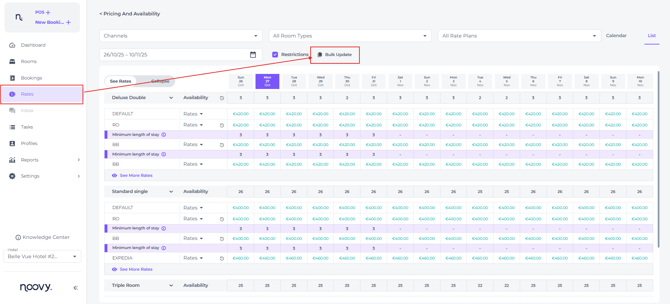
- You will find the restrictions, including the No Departure restriction, located at the bottom of the pop-up screen:
TAKE THE FOLLOWING STEPS TO SET UP THE NO DEPARTURE - RESTRICTION:
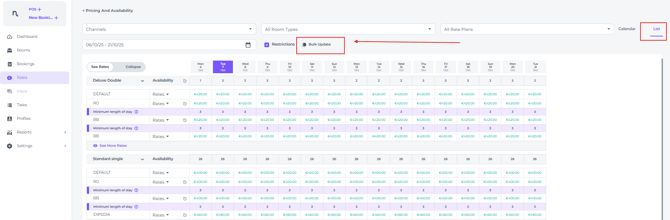
- The Bulk Update tool can be found in both List version of the Rates Calendar:
And on the Calendar version: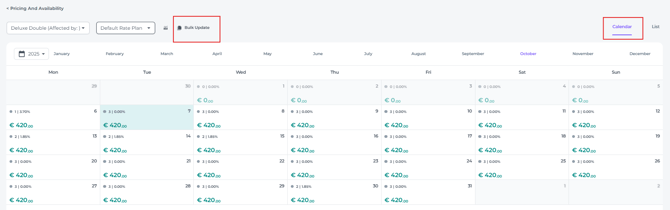
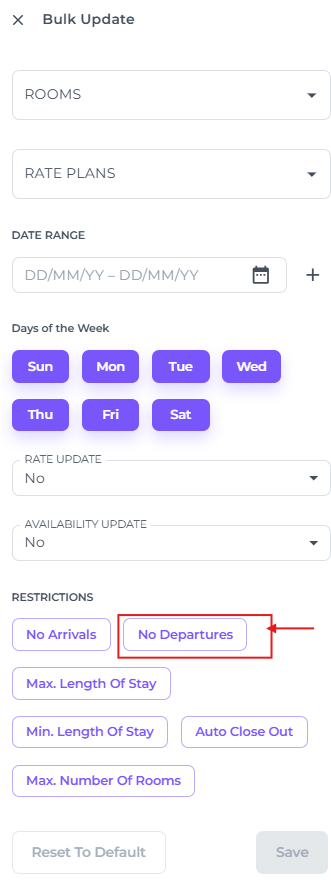
- By clicking on the Bulk Update a pop-up window will appear.
Firstly select the room type(s) that you wish to exclude from your Departures. (in most cases this will be ALL room types, so that the hotel will not have to manage any Departures at all) :
- Select the Rate Plan(s) that are applicable:

⚠️Important Note:
While changes to availability and prices are best made on the Default Rate Plan to ensure all linked rate plans update accordingly, restrictions should NOT be set on Default Rate Plan — doing so will not impact other rate plans.
Instead, apply restrictions directly to the specific Rate Plans you wish to affect.
For the No Departure restriction, this typically means applying it to all relevant rate plans to block arrivals on selected dates. Generally, if you wish to avoid having any arriving guest, this will mean that you select all rate plans excluding Default Rate Plan.
☝️By setting restrictions on all rate plans except the Default, you retain flexibility to easily lift these restrictions later by reverting to the Default settings via Reset to Default in the Bulk Update.
⚠️Yet, note that Reset to Default will remove all other manual changes to Rates and Prices as well.
- Choose the date range the No Departure restriction should be applicable to. You can choose multiple periods by using the + sign:

- You can specify which days of the week this action should apply to. By clicking on one of the days, it will become white and therefore inactive. The changes will not apply to an inactive day.

- Select the No Departures restriction and Save:
💡Tip:
To see other how to use bulk update check out our article "How to use the Bulk Update"