There are two main locations within the system to create a manual booking:
-
Via the New Booking Feature:

-
Via the Room Calendar:
Note: *Regardless of where you are in the system, you can always create a new booking via the New Booking Button located on the left top corner of your screen:
Option 1
Create a booking via New Booking
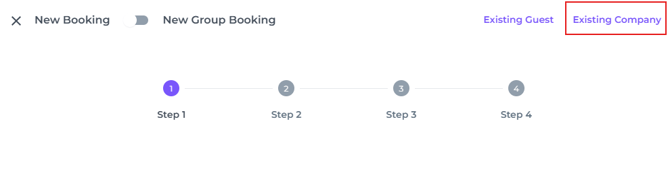
Creating a new booking will take just 4 steps:
-
General reservation details: Date, Boober/guest/pax/number of rooms
-
Roomtype and Rateplan
-
Booker & Guest details and Company details
-
Review, add Credit card details, send Confirmation and Confirm
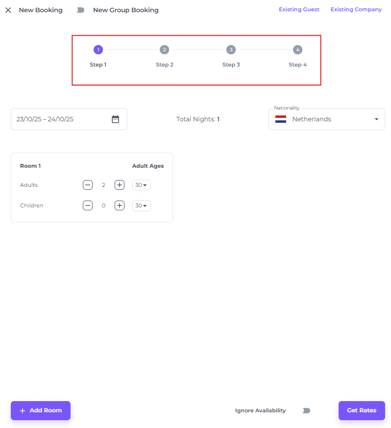
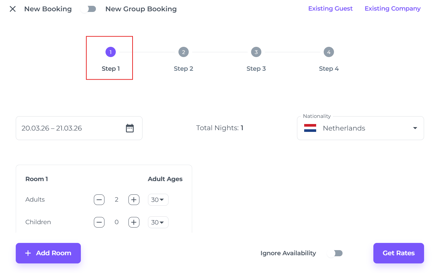
STEP 1
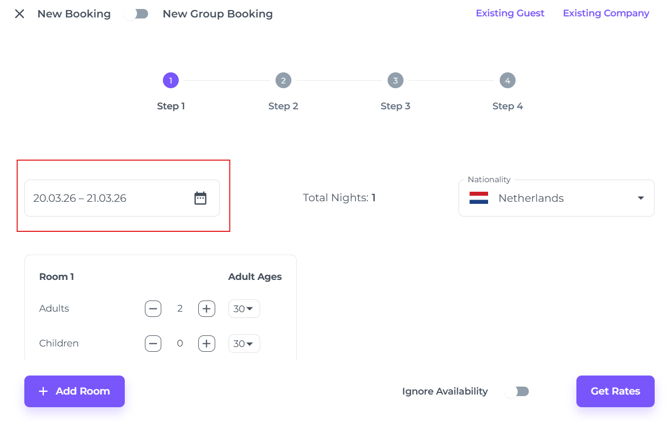
General reservation details: Date - Booker(Guest or Pax) - Number of rooms
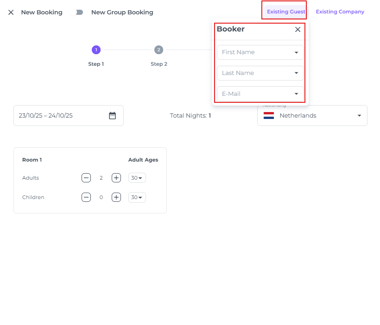
- Existing Guest - For returning guests, click to search for their profile:
☝️Please note:
Step 1 details apply to the booker. Selecting their profile here will auto-fill Step 3. If the booker isn't the guest, you can add guest details later as described in this article at step 3.
- Existing Company - If a company needs to be added
- Stay dates - in the date range field:
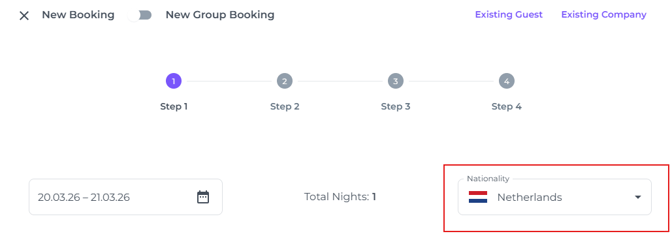
- Nationality -As stated on the guest's passport:
- Number of adults and age:
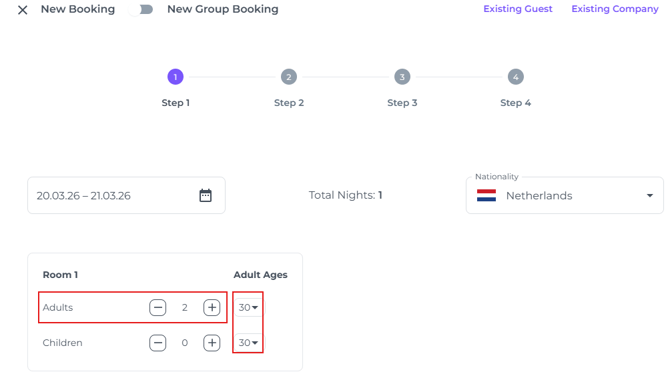
When selecting the number of children, you will be able to select their age:
- Add Room - Choose to have more rooms in one booking:
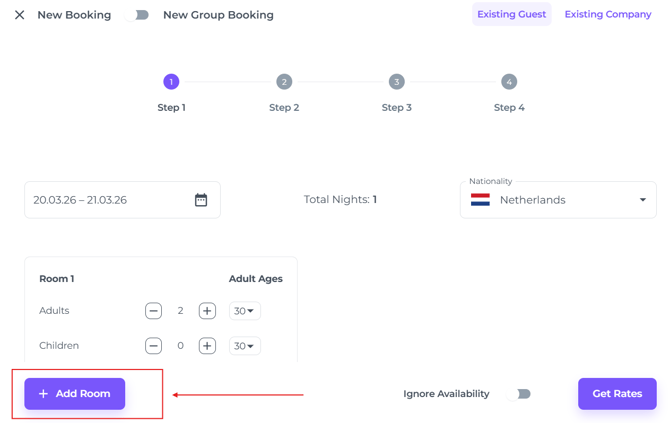
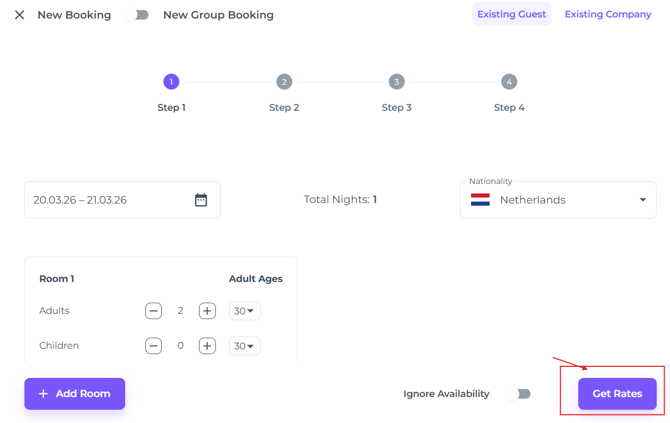
- Once all details are selected, click Get Rates:
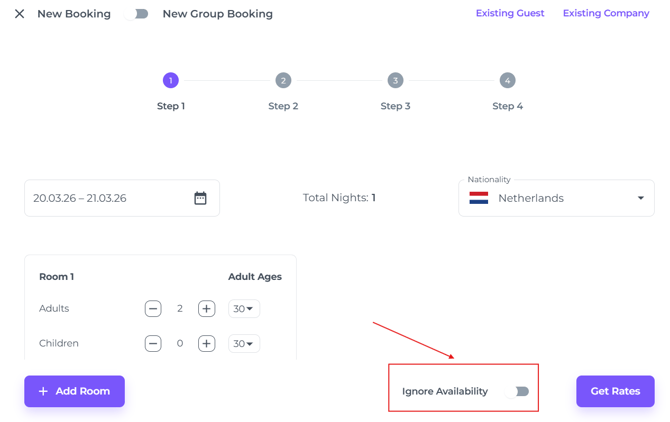
💡Tip:
If the hotel is fully booked and your permissions allow overbooking, toggle 'Ignore Availability' to proceed with the reservation.
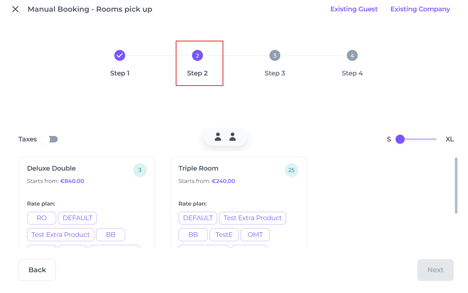
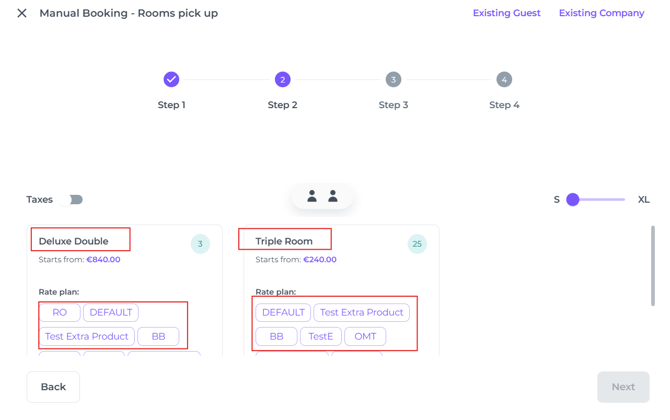
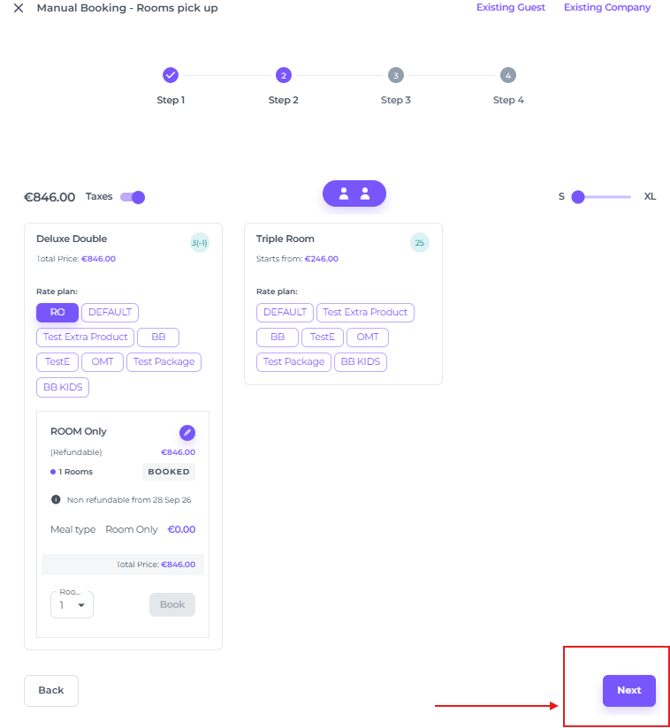
Step 2
Roomtype and Rateplan
-
-
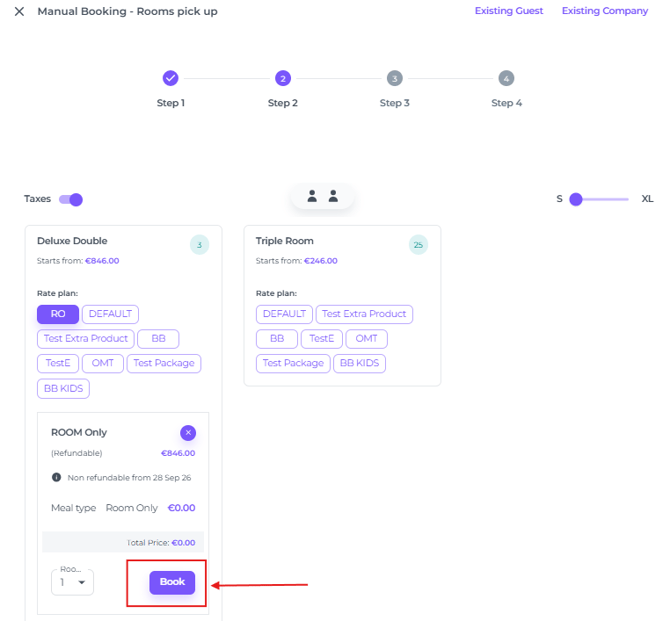
Choose Room and Rate Plan
- Book room
- Next to Step 3
-
-
Room Type - In the desired Room Type also select the rate plan
💡Tip:
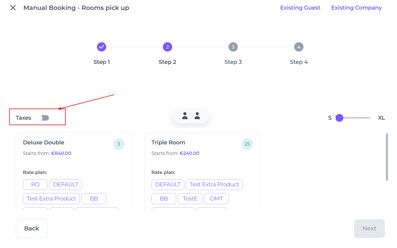
To view the total including taxes (like city tax), simply switch on the Taxes toggle.


-
Hit Book to continue:
-
Hit Next to go to step 3:
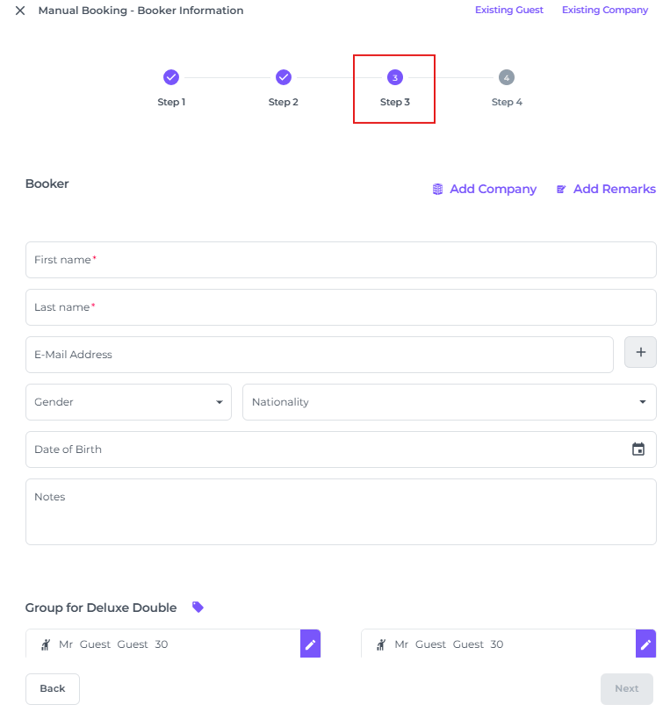
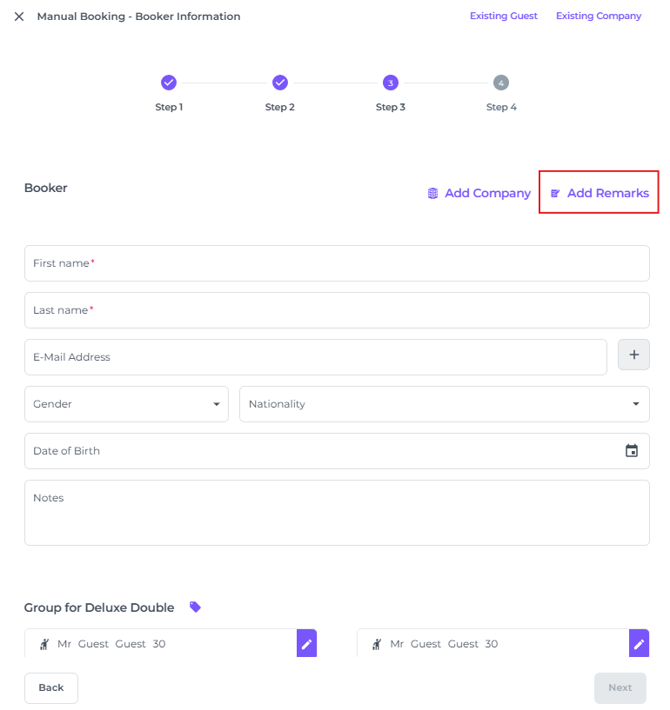
Step 3
Booker & Guest details and Company details
- Add the company details if it does not yet exist.
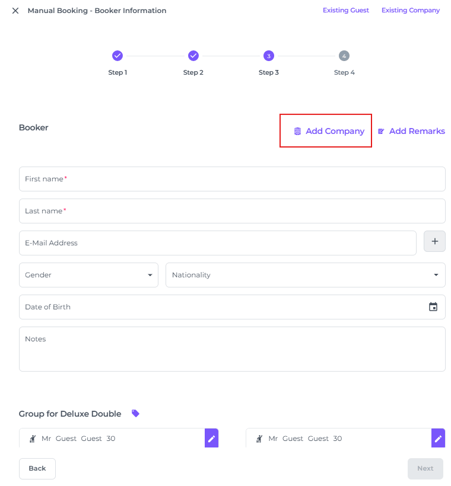

- Remarks vs Notes:
- Notes - Internal comments to stipulate important guest or booking information:
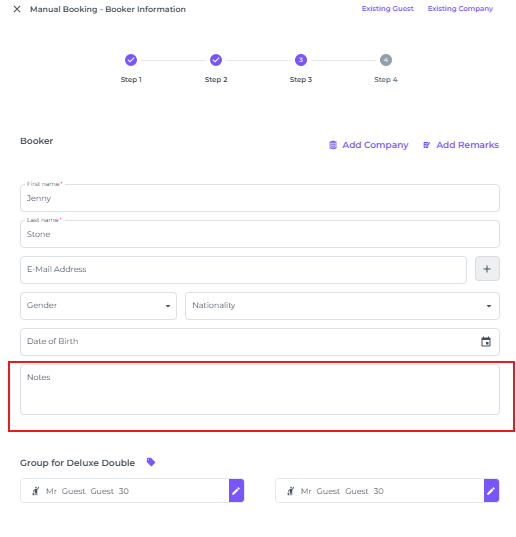
- Notes - Internal comments to stipulate important guest or booking information:
- Remarks
- typically contains comments imported from OTA bookings. For manual entries, leave this field empty unless you are migrating a reservation from an OTA or a previous PMS and remarks need to be transcribed.
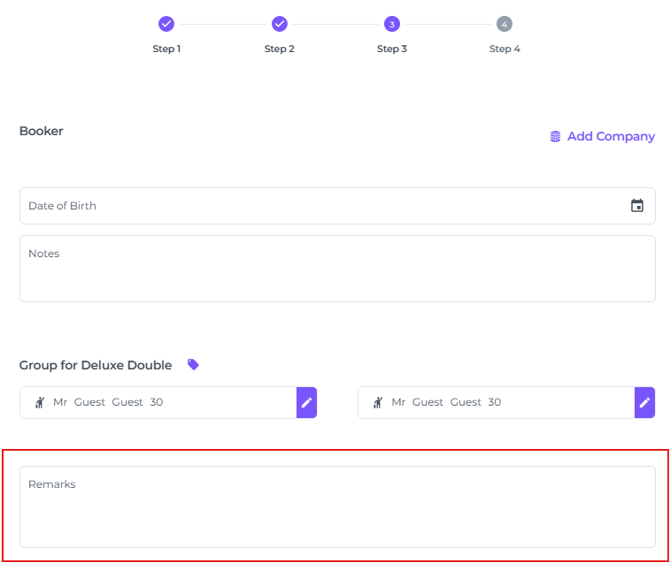
- typically contains comments imported from OTA bookings. For manual entries, leave this field empty unless you are migrating a reservation from an OTA or a previous PMS and remarks need to be transcribed.
-
-
Booker's information.
**Remember, the booker and guest are not always the same person, add staying guests details later in step 3-d.
📝Note:
The fields marked with a red asterisk (*) are mandatory. The mandatory fields are configured and managed by your manager.

- To identify the staying guests, click on the pen icon in the Group for ... (room type) :
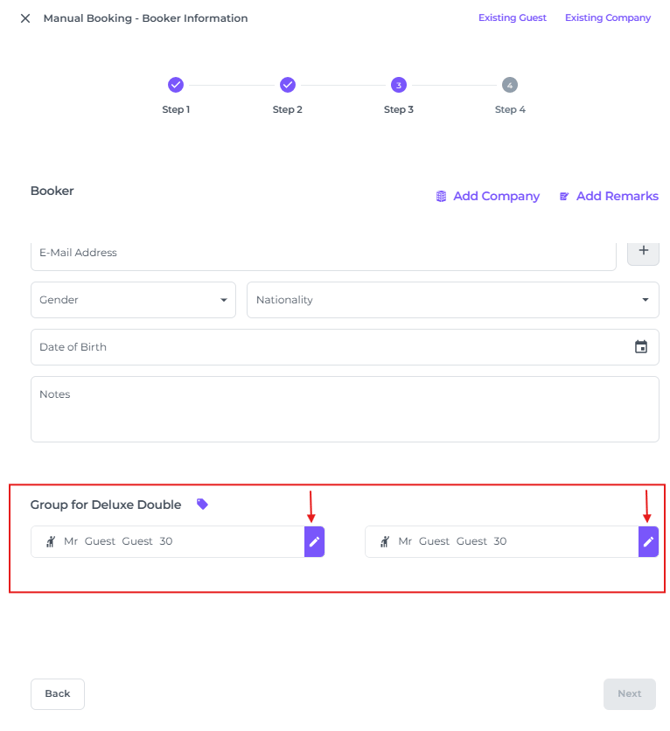
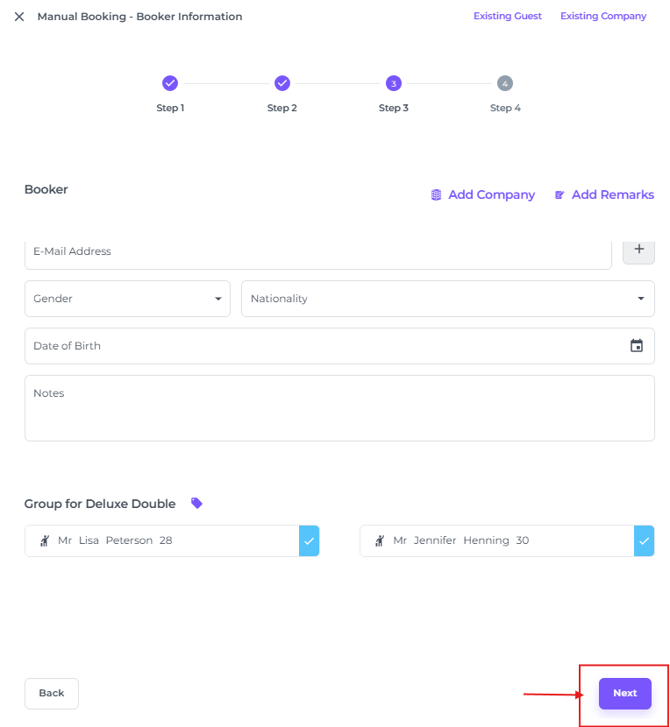
Fill out the gender, name and age for each staying guest if these are not the same as the Booker:
- Hit Next to continue to step 4
-
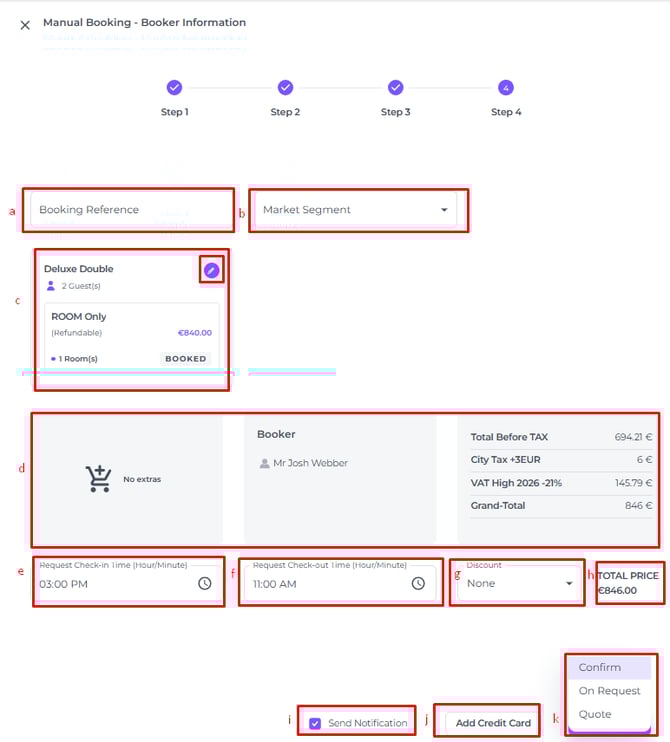
STEP 4
Review, add Credit card details, send Confirmation and Confirm
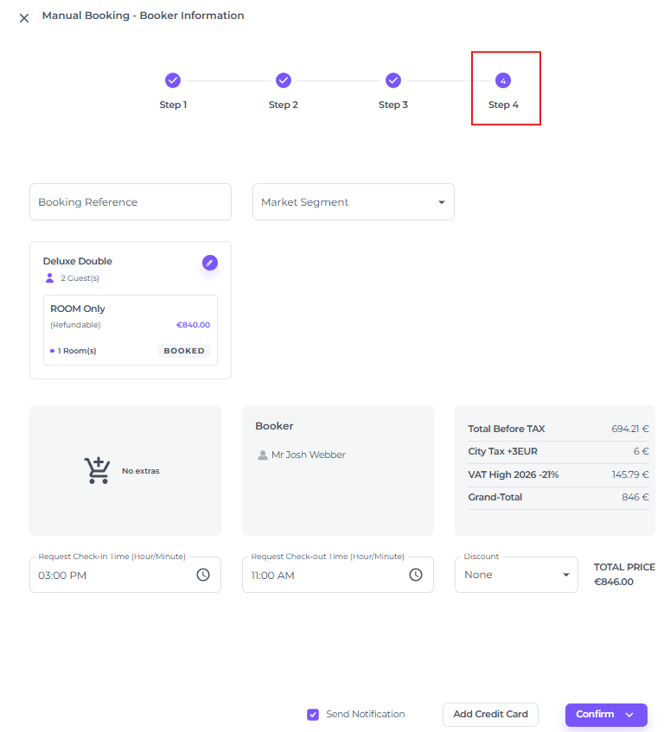
Fields explained:
-
- Bookings Reference - This field is typically left blank, as it is intended for the OTA reference number associated with a booking. It’s especially useful when manually importing bookings from a previous PMS, or in the rare event a booking does not transfer due to a technical issue.
- Market Segment - Categorise your booking by adding a Segment is desired. Read the article 'How to create and manage Segments'
- Edit Price - To adjust the set price for this booking, click the pen icon:

- Extras - When extra items are attached to the rate plan, they will be mentioned in this field.
- Booker - The Booker name will be stated here.
- Breakdown -The total amount is displayed both with and without taxes, with each tax clearly itemized by type.
- Check in- and Out times - For internal reference, use this field to indicate times that fall outside the standard check-in and check-out hours.
- Discount - If permitted by your user role, you can apply a percentage-based discount in this field.
- Send Notification - By default, this option is enabled to automatically send a confirmation to the booker once an email address has been provided. Untick this box if you do not wish to send a confirmation.
- Add Credit Card - If credit card details are available, enter them here to guarantee the booking.
- 3 Options:

- Confirm
- On Request With 'On Request' bookings, the room stays available until confirmed by the hotel. Manual confirmation is required to guarantee the reservation and allocate the room.
- Quote (Specify a deadline for automatic cancellation if the booking is not confirmed) :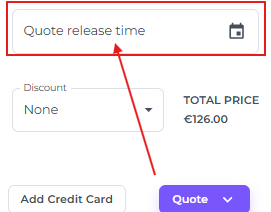
💡 TIP:
At any point during the booking process, you can easily navigate back to a previous step before confirming the reservation—just click on the step you’d like to revisit.

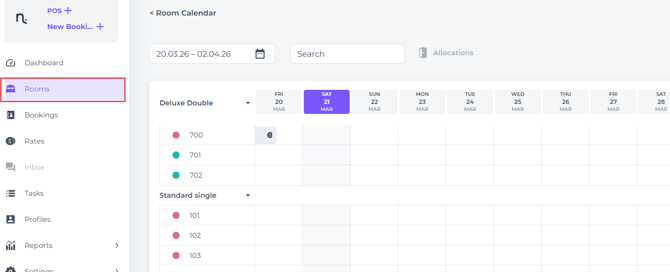
Option 2 - Create a booking via Rooms (Calendar):
Prefer the Room Calendar?
You can create new reservations directly from this view.
- From the main menu click on Rooms:

- If a booking extends beyond your current view, use the date range bar to select and display the correct period.

- Select a room number. For immediate walk-in check-ins, choose a room marked as 'clean'

- Hover over your desired arrival date next to any room number. When the cross appears, click to select:
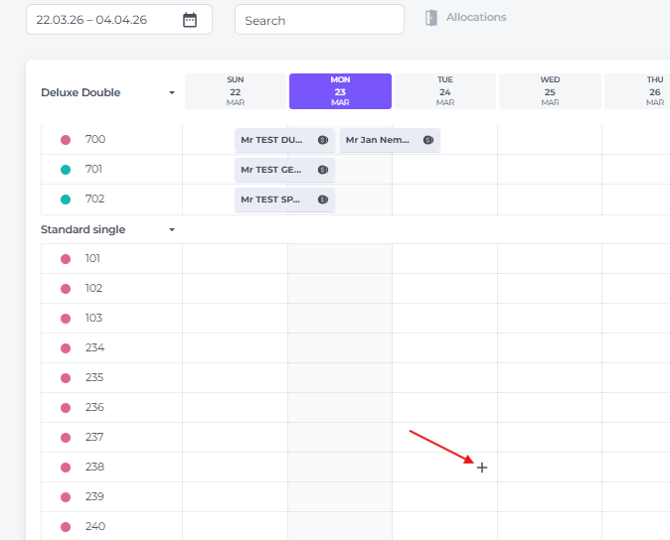
- Click on the cross to trigger the pop-up window.

- To extend the booking, click and hold the double arrow, then drag the bar to the guest’s departure date:

- Click on the cross > a drop down menu will appear:
Out Of Order
Out Of Service
Add Booking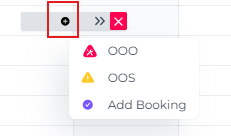
- - Click Add Booking
- Select a Rate Plan
- Enter the Booker's name
- Hit Confirm or Quote (*see 📝 note below for more information)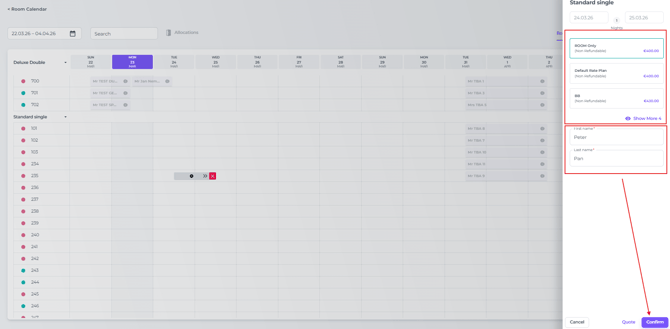
- The reservation will instantly show up on both the Room Calendar and the Booking List:

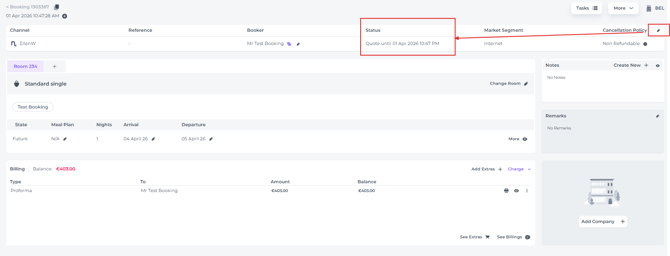
QUOTE Booking via the Rooms Calendar:
Use the 'Quote' feature to create a temporary booking option.

The default colour of a Quote booking in the Rooms Calendar is blue: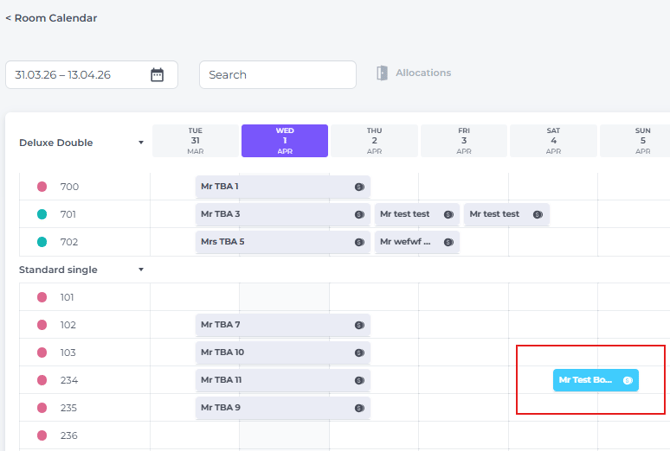
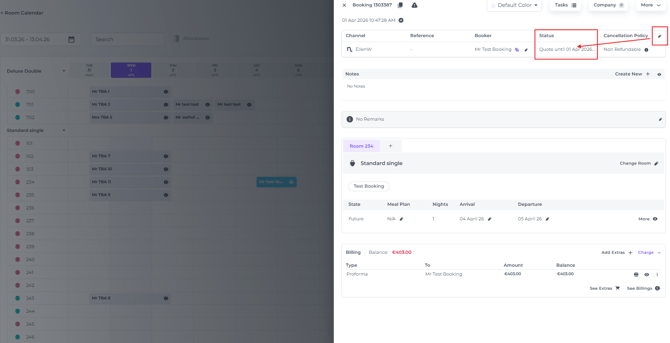
Quotes follow the default release time set in your Hotel Settings:
But you can manually adjust the expiry date directly in the Booking Pop-up or on the Booking Page.
Booking Pop-Up (by clicking once on the reservation in the Rooms Calendar:
Booking Page: (by double clicking on the reservation in the Rooms (Calendar)