✨Before you start✨
Know that Noovy is here to help. Setting up Payment Rules can be challenging at first, so do not hesitate to contact Support at any point if you get stuck.
What are Payment Rules?
Payment Gateway Rules allow you to establish bespoke automation for your property. They determine exactly when, what, and how payments (or authorisations) are processed through the Stripe gateway. Thanks to a wide range of configuration options, you can tailor these rules to meet your specific operational requirements with precision.
Monitoring via Logs:
To review payments triggered by these rules and verify their status, you can consult the Payment Gateway Logs.
Pro Tip - daily check:
Reviewing the Payment Gateway Logs daily keeps you informed about failed transactions, so you can promptly contact guests for an alternative payment method or cancel the booking if needed. We recommend adding this check to your daily checklist.
Where to set up Payment Gateway Rules?:
- In the Main Menu go to Settings - Payment Rules:

- Stay on the tab Rules:

❇️ EXAMPLE SCENARIO - Let's create a rule together
Based on the following example rule scenario - what where when:
-
Source:
A reservation is received via a an OTA /Channel
-
Policy:
The booking is non-refundable and therefore pre-paid (Post-, and Pre-paid configured within the relevant Rate Plan settings)
-
Payment:
The full reservation amount needs to be collected on the arrival date
-
Method:
A charge on a VCC (Virtual Credit Card) is applicable for this transaction
-
Taxes:
Only VAT is included in the total charge
(In this article we will highlight the scenario with: ❇️ Scenario)
-
Start with + New Rule:

New Rule Tab 'When' - When should the automation run?

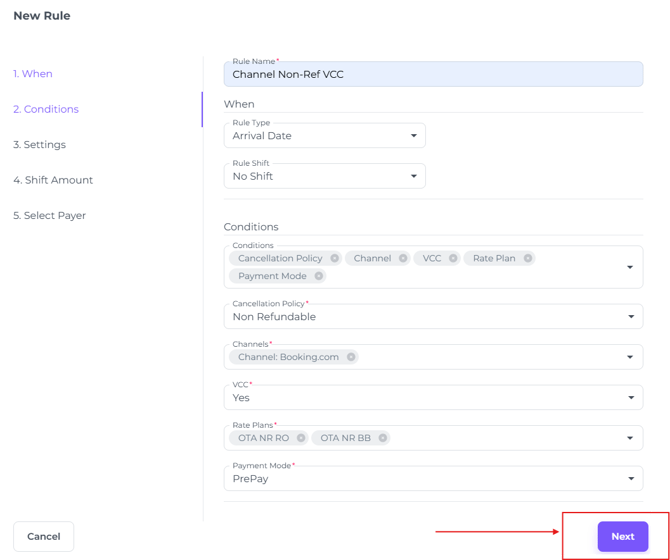
- Rule Name:
Create a strong, defining name which is easily recognisable.

❇️ Scenario:
A strong defining name for our example rule would be:
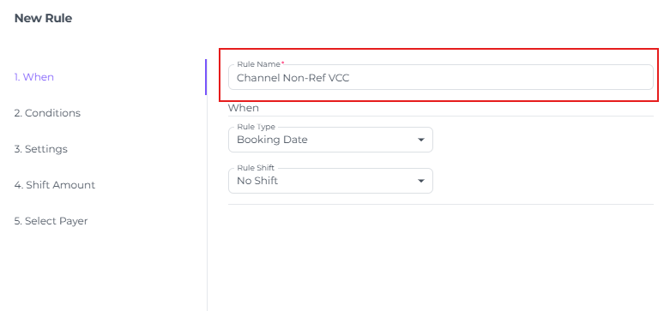
- Rule Type
Select the appropriate rule timing:
- Booking Date: Will process the charge within a few hours of the booking being created.
- Arrival Date: Will process the charge in the early hours of the arrival day.
- Check-In Date: Will process the charge the moment the booking is checked in.
- Check-Out date: Will process the charge the moment the booking is checked out
- Departure Date: Will process the charge in the early hours of the departure date.
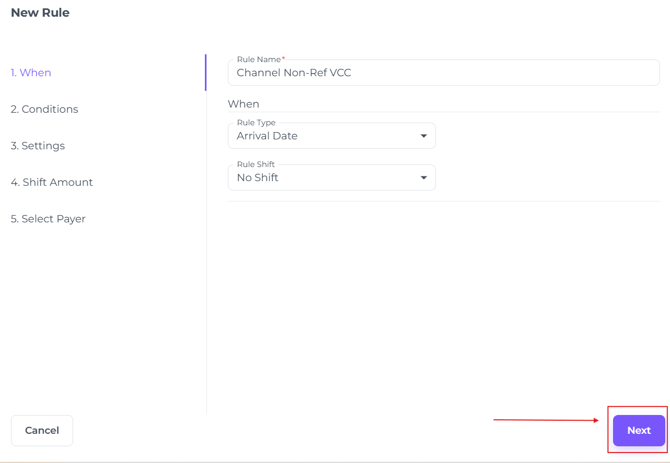
❇️ Scenario:
It is advisable to select 'Arrival Date'. This ensures the VCC is active and can be charged in the early hours of the day the guest is due to arrive.
📝Note:
For OTA bookings, VCCs often only become active shortly before arrival. If a guest books months in advance, the card will likely be inactive on the 'Booking Date', leading to failed payments. All the more reason to select ‘Arrival Date’ in the Rule Type field.
- Rule Shift:
This option lets you specify a more precise moment for when the charge should be processed.- No Shift - the system will process the payment on the day of arrival:

- Add - Schedule the payment collection for a specific number of days or hours after Arrival Date:

- Deduct - Set up the payment collection several days and/or hours prior the Arrival Date:

- No Shift - the system will process the payment on the day of arrival:
❇️ Scenario:
We will opt for No Shift, to charge the VCC on the arrival date (which the system will process in the early morning)
According the scenario criteria the VCC is charged on arrival date. The card needs to be charged prior guest's arrival.
- Go to Next for tab 2:
New Rule Tab 'Conditions' - What conditions are applicable?

- Enter the correct criteria to ensure the rule only targets reservations that strictly meet the requirements:
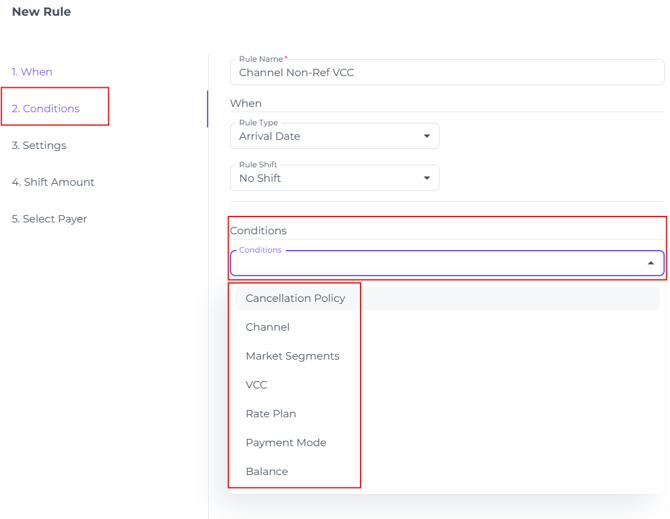
- Cancellation Policy: Refundable or Non-Refundable bookings
- Channel: The OTA/ Channel you wish the rule to be applicable for
- Market Segment: If Market Segments are configured, you can apply the rule to one of them.
- VCC: Determine if the Rule applies exclusively to Virtual Credit Cards Yes or No.
- Rate Plan: Rule applies to specific rate plan(s); multiple rate plans can be selected.
- Payment Mode: Pre paid or Post Paid bookings
- Balance: Decide if the rule runs based on the existing booking balance at the time of execution (Greater than >, Less than <, or Equal to =).
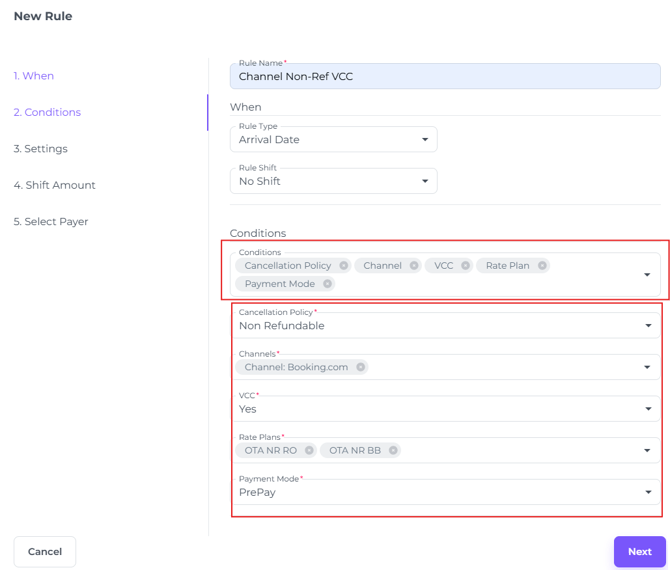
- Once you have selected the conditions, choose the relevant option from the dropdown menus below it:

❇️ Scenario:
We will leave out Market Segment and Balance, as we have no instructions from the example criteria.
-
Cancellation - Non Refundable
-
Channels - in this case we will opt for Booking.com only (with the idea to have the possibility to add more channels to it at a later stage)
-
VCC - Yes
-
Rate Plans - Only the ones that are Non Refundable and mapped to (in this example) Booking.com
-
Payment Mode - PrePay, want het betreft non refundable rateplans
- Hit Next for tab 3:
New Rule Tab - 'Settings' - What should determine the amount to be charged, authorised, or included in the payment link?

- Amount:
Determine what you would like to charge. Select the specific amount type for this rule.- First Night: The first night of a multi-night stay
- Full Amount: All booking nights
- Product Type: Charge only Product Types linked to the booking (e.g. meals, drinks, extras etc)
- Any Amount: Specify a fixed amount to be charged
- Specific Product: Select which specific product(s) or item(s) should be charged—for example, when a downpayment or credit card authorisation has been agreed.
❇️ Scenario:
We will opt for the most common non ref policy and charge Full Amount.

For non-refundable bookings, the Full Amount is typically charged. This can differ per reservation, though. For instance, some policies only make the first night non-refundable.
- Tax:
You can Select Exclude all taxes, Include all taxes, or select manual Taxes:
In most cases, only VAT will need to be charged. In rare situations, Tourist Tax or City Tax may also need to be added to the total.
- Exclude all taxes: No taxes will be applied, including VAT; the rule charges only the net amount.
- Manual Taxes: Select the relevant tax type (e.g. VAT, Tourist Tax, City Tax) from your configured tax settings.
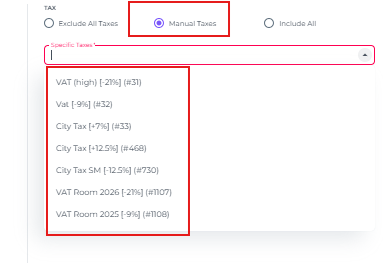
- Include all: All configured taxes will be applied, so every active tax type in your settings is included.
❇️ Scenario:
In most cases, Channels only pay VAT on VCC transactions.
So we will choose for our example Manual Taxes > VAT (NL = BTW) :
- Hit Next to go to tab 4
New Rule Tab 4 - 'Shift Amount'

-
Shift Amount:
Confirm the amount defined in Step 3 and, if required, apply additional adjustments here:
- None : Select this if no further adjustments are needed.

- Add: Use this to add either a fixed amount (Absolute) or a percentage (Relative) on top of the Step 3 total—ideal for charging or authorising incidental deposits:
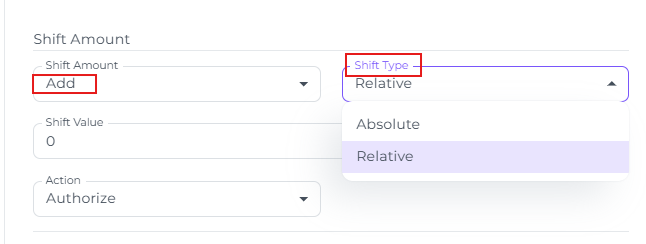
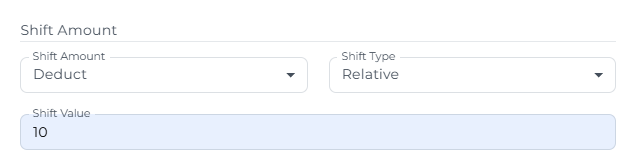
- Deduct: Use this to subtract either a fixed amount (Absolute) or a percentage (Relative) from the Amount Type selected in Tab, for example, to apply a 10% discount.
- None : Select this if no further adjustments are needed.
❇️ Scenario:
As there are no instructions in the example scenario No Shift is what we will opt for.
-
Action:
What transaction should be executed - Charge, Authorise or sent a Payment Link?

❇️Scenario: the VCC should be Charged
- Click on Next to Continue to Payer options:

New Rule Tab 5 - 'Select Payer'
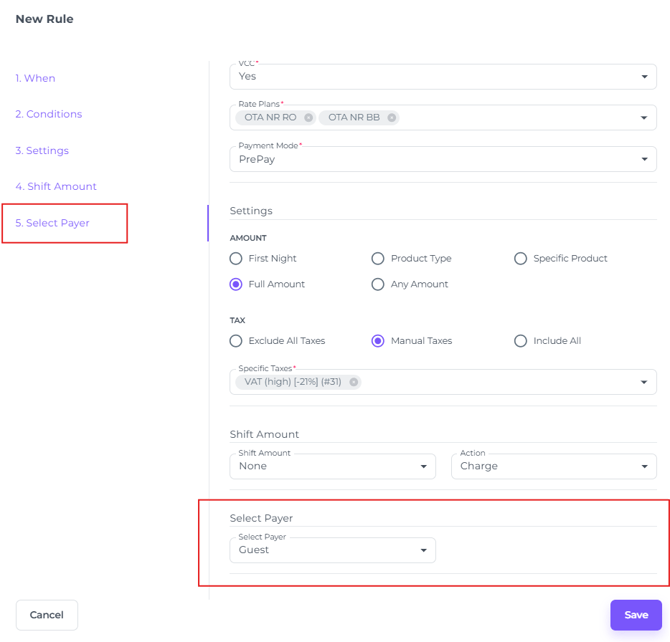
- Select Payer:
To ensure the correct payer appears on the document generated after the transaction, you must select the appropriate Payer Type:
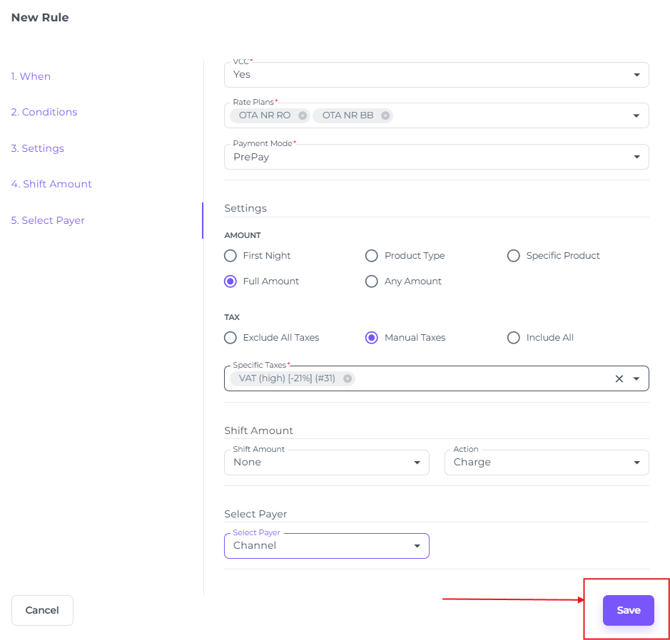
❇️Scenario: Channel is the Virtual Credit Card (VCC) is issued by the OTA/Channel
- Click Save to finalise your payment rule and immediately activate the configured actions.
The Rule is created!
It will be added to your existing Rule Engine list and become active immediately.
Here are example rules configured for a specific hotel:

🛠️ Trouble Shooting:
If the Save button is inactive (greyed out), please check all fields. You will be unable to save the rule if any required information is missing.
